Guide to Trench Composting
Trench composting, often called “pit composting” or “vertical composting”, is one of the oldest, simplest, and most effective ways to build soil health. While modern gardening often emphasizes high-tech bins and expensive additives, trench composting returns to the basics: burying organic waste directly into the garden soil so it can decompose in place.
In this guide, we will explore why this “no-fuss” method is a cornerstone of permaculture design, how to implement it step-by-step, and how to adapt the practice for different climates and garden layouts.
What is Trench Composting?
At its core, trench composting is the practice of burying kitchen and garden scraps in a hole or shallow trench within your growing area. Unlike a traditional compost pile that requires “turning” to introduce oxygen (aerobic decomposition), trench composting relies on anaerobic and facultative decomposition.
As the Nebraska Extension explains, this buried waste is broken down by soil bacteria and earthworms with very little air. Because the scraps are hidden underground, the process is odorless, invisible, and requires zero management once the soil is backfilled.
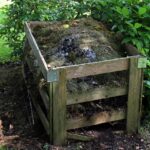
Why it Works
Nature’s microbes and worms do the heavy lifting. By placing organic matter directly into the root zone of future or current plants, you are essentially “pre-loading” the soil with nutrients. As the material breaks down, it creates a pocket of rich humus that acts as a slow-release fertilizer and a moisture-wicking sponge.
Trench Composting and Permaculture Ethics
In a permaculture garden, every element serves multiple functions, and “waste” is viewed as a misplaced resource. Trench composting embodies several core permaculture principles:
- Produce No Waste: Kitchen scraps and garden debris are returned to the Earth on-site, closing the nutrient loop.
- Catch and Store Energy: The chemical energy in a banana peel or coffee ground is captured and stored directly in your garden bed rather than being hauled away to a landfill.
- Integrate Rather than Segregate: Instead of having a “compost area” separate from the “garden area,” the two systems are integrated into one.
- Obtain a Yield: The yield here is not just the vegetables you grow, but the long-term fertility and structure of the soil itself.
By burying organics, you mimic the natural forest floor where organic matter falls and decomposes in situ. This creates a resilient ecosystem that reduces your dependence on external inputs like bagged fertilizers or store-bought compost.
How to Start Your First Trench Composting
Getting started is as simple as “dig, fill, cover.” However, a little bit of strategy goes a long way in ensuring success.
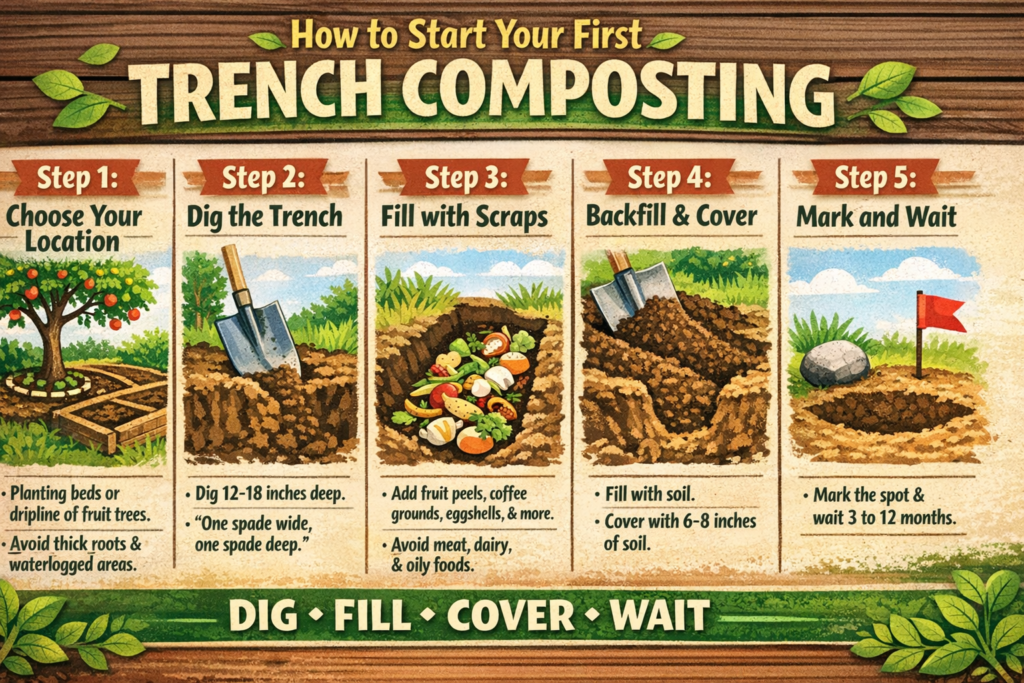
Step 1: Choose Your Location
Ideal spots include active planting beds, unused rows, or the dripline of fruit trees and shrubs.
- Avoid: Digging directly against large plant trunks or thick roots.
- Avoid: Waterlogged ground. As Plews Garden Design cautions, trenching is “not really suitable for wet, waterlogged ground,” as the scraps may turn into a foul-smelling mush rather than decomposing.
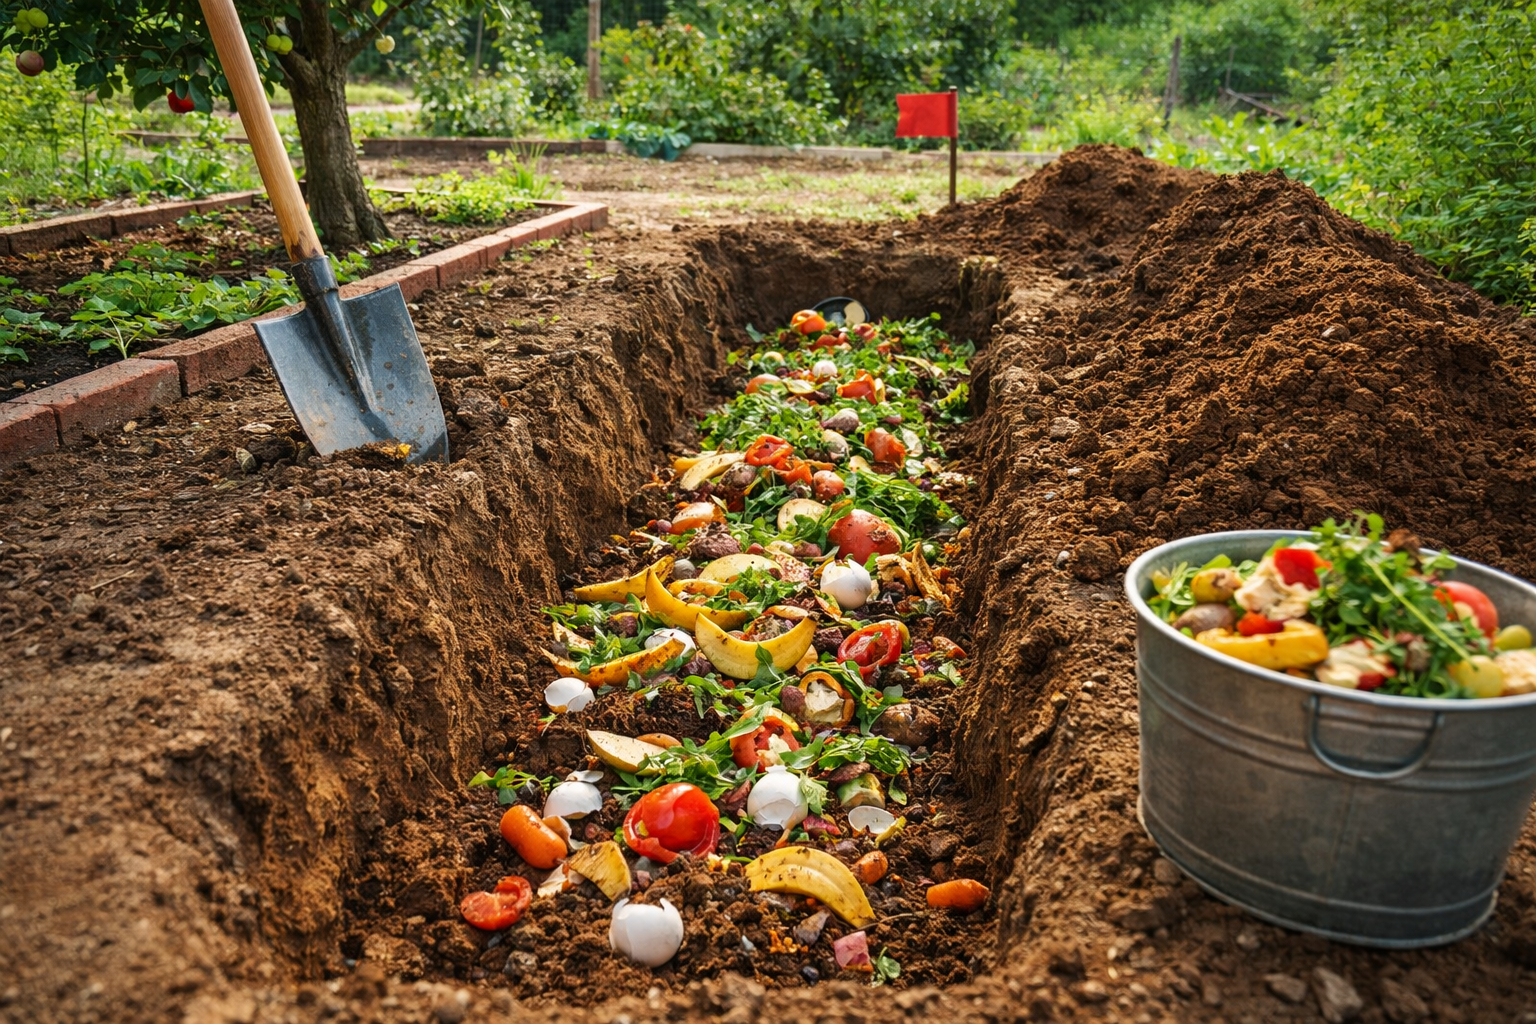
Step 2: Dig the Trench
Use a spade to dig a hole roughly 12 to 18 inches deep.
- The “Spade” Rule: Garden Organic (UK) recommends digging “one spade wide and one spade deep.”
- Shape: You can dig individual “pockets” for small amounts of waste or a long trench for larger quantities.
Step 3: Fill with Scraps
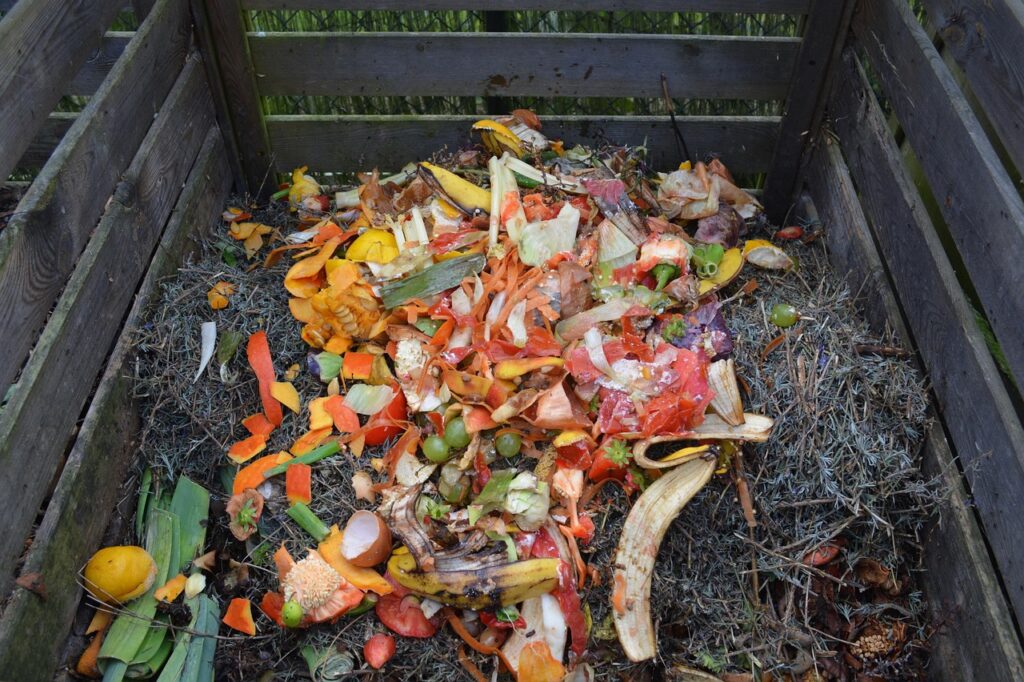
Add your organic material. To speed up the process, chop or shred larger items.
- The “Yes” List: Fruit/veg peels, coffee grounds, eggshells, grass clippings, and tea bags.
- The “No” List: Meat, bones, fish, dairy, or fatty foods. These can attract scavengers and take much longer to break down.
Step 4: Backfill and Cover
Fill the trench about 2/3 full with waste, then cover it with the remaining soil. Ensure there is at least 6 to 8 inches of soil on top. This depth is crucial for deterring pests and containing odours.
Step 5: Mark and Wait
Place a flag or stone to mark the spot. Depending on your soil temperature, the waste will transform into humus in 3 to 12 months.
Also read: What is Bokashi Composting?
Strategic Integration Methods
There are several ways to incorporate trenching into your garden design. The following table compares the most popular methods:
Comparison of Trenching Methods
| Method | Best For | Implementation | Key Benefit |
| Between Rows | Active vegetable gardens | Dig a narrow trench between rows of corn or squash. | Feeds “heavy feeders” during the growing season. |
| Trench Rotation | Large, organized plots | Divide garden into 3 strips: Trench, Path, and Planting. | Cycles fertility through the entire garden over 3 years. |
| Dripline Feeding | Fruit trees and shrubs | Dig small pockets at the edge of the tree’s leaf canopy. | Provides slow-release nutrients to deep perennial roots. |
| New Bed Prep | Establishing new gardens | Trench in autumn and cover with mulch/cardboard. | Creates rich, fluffy soil by springtime planting. |
Managing Climates
Trench composting is a global technique, but the local weather dictates the “speed” and “style” of the process.
Cold Climates
In freezing regions, the goal is to beat the frost. Dig your trenches in late fall. Covering the trench with an insulating layer like straw, hay, or an old blanket can prevent the soil from freezing solid, allowing microbes to work a little longer into the winter.
Hot and Arid Climates
In dry areas, trenching is a lifesaver. Buried organic matter acts as a “cool, wet sponge.”
- Pro-Tip: The NRDC advises watering the soil above the trench to maintain the moisture levels necessary for microbes and earthworms to stay active.
Tropical and Humid Climates
Warmth and moisture accelerate decomposition. You may find that scraps disappear in just 8–10 weeks. However, ensure your trenches are in well-drained soil to avoid “souring” the compost during monsoon seasons.
The Pros and Cons of Trench Composting
Before committing your entire garden to trenches, consider these trade-offs:
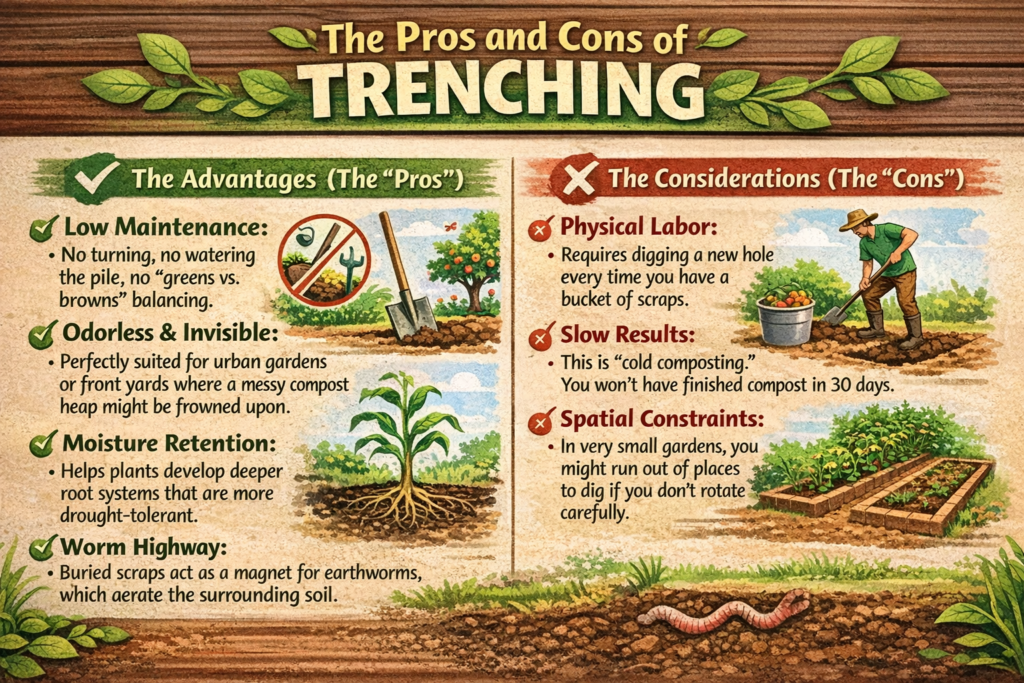
The Advantages (The “Pros”)
- Low Maintenance: No turning, no watering the pile, no “greens vs. browns” balancing.
- Odorless & Invisible: Perfectly suited for urban gardens or front yards where a messy compost heap might be frowned upon.
- Moisture Retention: Helps plants develop deeper root systems that are more drought-tolerant.
- Worm Highway: Buried scraps act as a magnet for earthworms, which aerate the surrounding soil.
The Considerations (The “Cons”)
- Physical Labor: Requires digging a new hole every time you have a bucket of scraps.
- Slow Results: This is “cold composting.” You won’t have finished compost in 30 days.
- Spatial Constraints: In very small gardens, you might run out of places to dig if you don’t rotate carefully.
Summary of Best Practices
To ensure your trench composting journey is successful, keep these “Golden Rules” in mind:
- Depth is your friend: Always maintain at least 6 inches of soil cover.
- Chop it up: The smaller the pieces, the faster the soil microbes can finish the job.
- Water in dry spells: If the soil is bone-dry, the decomposition will stop. Keep it damp like a wrung-out sponge.
- Avoid Pathogens: Never bury pet waste or diseased plant material in your vegetable trenches.
Also read: Why your compost smells like ammonia and how to Fix It?
Conclusion
Trench composting is the ultimate “slow gardening” technique. It requires patience but rewards the gardener with a self-sustaining system of fertility that improves over time. Whether you are a beginner looking for a no-fuss way to recycle kitchen scraps or a seasoned permaculturist looking to “close the loop” in your garden, burying your waste is a simple act with profound benefits.