Starting a Worm Casting Business
The demand for organic, chemical-free fertilisers is booming, and worm castings (worm poop) are nature’s miracle nutrient-rich, easy-to-use plant food that gardeners, farmers, and eco-minded consumers love. With growing interest in sustainable gardening and local food safety, launching a small-scale or backyard worm farm can be a low-cost, rewarding way to earn extra income (and reduce waste). In fact, one entrepreneur notes that a worm farm startup can be done for “under $1,000 or as low as a couple hundred” if you use simple bins, bedding and free feedstocks.
In this guide, we’ll walk through step-by-step how to set up a profitable worm casting business in 2026, covering everything from choosing your setup and sourcing worms to feeding, harvesting, pricing, and marketing.
Worm Farm
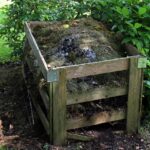
1. Choosing a Location and Bin
Select a convenient, sheltered spot for your worms. Worms thrive in cool, dark, moist environments (ideally 55–75°F) with minimal direct sunlight. A garage, basement corner, shaded backyard spot, or shed can work well. They do not like freezing or very hot temperatures. The area should be accessible for you to feed and harvest easily, but out of the way of pets or children.
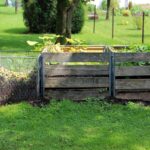
You can start very small, even a 5-gallon storage tote works for a pound of worms, or scale up to multiple bins or a larger container. Recommended containers include plastic tubs, wooden crates, or even old refrigerator/cooler bodies (with holes drilled for ventilation). As one expert advises, “making your own worm bins/beds is not only easy, but will save a LOT of money,” since DIY bins (plastic totes, wooden frames, or in-ground pits) are cheap. For example:
- Small DIY bin: A plastic tote or wooden box (~2–3 sq ft surface area) can hold 1–2 lbs of worms and be managed from home.
- Medium system: Several bins in a garage or basement could process tens of pounds of kitchen scraps per week.
- Backyard beds: Vermicomposting beds can also be dug in soil (earthworm lanes) as a low-tech option (cost ~zero).
No fancy setup is needed at first, even placing a standard compost bin off the ground (for drainage) can serve as a worm bed. Simply ensure the container has drainage holes and is on a tray to catch any leachate. The extension specialist notes: “Avoid deep containers (over 15″); they get heavy and block worms from reaching food at the bottom”. It’s easy to upsize later if needed – many growers start with one bin and add more as sales grow.
2. Equipment and Bedding
Getting started requires only basic supplies. Below is a checklist of essentials, with rough estimates of startup costs (for a very small system):
- Worm bin/container: Any dark plastic/wood box with lid (home-built or purchased). Cost: $0–$50. (Example: a plastic tote ~ $10–20.)
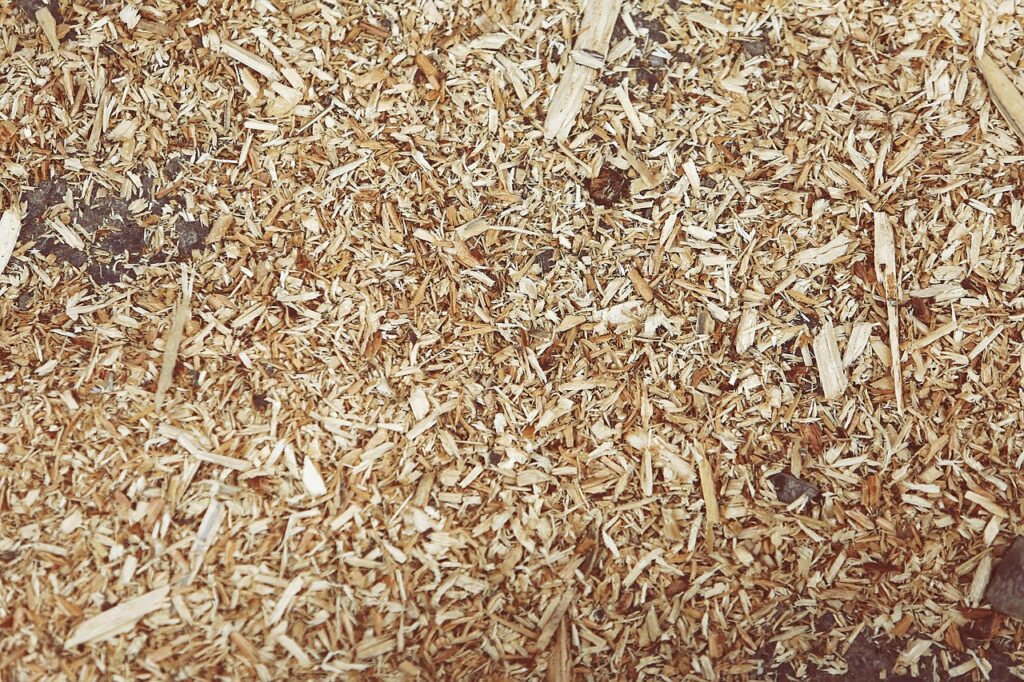
- Bedding material: To start, use shredded paper, cardboard, coconut coir or aged animal manure. These provide a moist habitat. (Uncle Jim’s and extensions recommend shredded paper/newspaper or cardboard, as well as coconut coir, straw or dead leaves.) Cost: often free or ~$10 for coconut coir/bedding initially.
- Red worms (Red Wigglers): These are the workhorses of any vermicompost system. You’ll need an initial “seed stock” of worms. A good rule is 1 lb of worms (about 800–1000 red wigglers) for each 2 sq ft of bin area. One pound of worms will eventually eat about their weight in kitchen scraps per day. Costs vary by source: for example, Uncle Jim’s sells 1,000 red composting worms for about $45, and 500 worms for ~$50. (Bulk starters or used bins may be cheaper.) Alternatively, ask local gardeners or farmers – many have worm piles and will donate a handful of worms for free.
- Kitchen scraps/feedstock: Worms eat vegetable and fruit waste, coffee grounds, eggshells, and other “green” kitchen scraps. Avoid meat, dairy, citrus and oily foods. Most feed can be collected at little to no cost by partnering with kitchens, restaurants, or local farms.
- Tools: A few simple tools will make life easier. Have on hand a shovel or pitchfork (for mixing bedding), buckets or trays (for harvest and transport), and a spray bottle to moisten bedding if it dries out. As you scale up, you may want a worm sifter or screen to help separate worms from castings. For outdoor bins, garden forks or hoes work fine.
- Packaging and shipping supplies: If selling to customers or stores, get durable bags or containers. Reusable cloth bags or compostable bags (breathable for castings) work well. One worm farmer recommends suppliers like Uline for cloth bags and packaging. You’ll also need labeling materials and shipping boxes or tubes if selling online.
- Miscellaneous: Thermometer (to monitor bin temperature), pH test strips (optional), durable scales (for weighing output).
In summary, total startup cost for a very small bin (1–2 sq ft) can easily be kept below $300–400 by repurposing materials, collecting free bedding, and starting with a modest batch of worms. The largest expense is usually the worms themselves and any purchased bin. You may also budget a small amount for legal requirements (business license, etc., ~$100–200).
Setting Up Your Worm Farm (Step-by-Step)
Once you have your location, container, bedding and worms, follow these steps to establish the farm:
Step 1: Prepare the Bedding. Moisten shredded paper/cardboard or coconut coir so it is damp but not soaking wet. Fill the bin about half full with this bedding. (For example, soak a few grocery bags of shredded newspaper in water for a minute, then drain excess). The bedding should fluff up to create air pockets. A loose, airy bed keeps worms comfortable and prevents anaerobic rotting. If using coir or peat, add water so it’s moist (crumbly when squeezed).

Step 2: Add Worms. Gently sprinkle your worms onto the bedding. They will naturally burrow down away from light. Cover the bin with its lid and place in the chosen location. If you’ve just purchased worms, mix a small handful of their shipping medium (often peat or coir) with the bedding so they have familiar material. No need to feed right away; let worms settle for a day. Within a few days, you can start feeding as below.
Step 3: Feeding Schedule. Feed your worms regularly to build population and castings. A balanced diet of “greens and browns” is key. Good foods include vegetable peels, fruit scraps, coffee grounds and crushed eggshells. Mix the food into bedding (bury it under the bedding surface) to avoid pests. Feed modest amounts 2–3 times per week, only adding more as the worms multiply and consume the old food. For example, start with a cup of food waste per week for a small bin, then increase gradually.
Tip: Keep a bin tray or absorbent pad underneath to catch any leachate (liquid run-off); you can dilute this “worm tea” and use it as liquid fertilizer.
Step 4: Maintain Moisture and Temperature. Worms breathe through their skin, so the bedding must stay moist (like a wrung-out sponge). Check weekly: if bedding feels dry, mist with water. If it’s too wet or smelly, add dry shredded paper or cardboard. Monitor temperature: ideal is ~60–75°F. In hot climates, shade the bins; in winter, move bins indoors or insulate. Red wigglers will stop eating and multiply slowly if it’s too cold or hot.
Step 5: Prevent Pests and Issues. Keep bins covered (worms hate light) and avoid overfeeding, which can attract fruit flies or rodents. Mice and rats may investigate meat/dairy scraps – another reason to avoid those. If flies appear, reduce feeding or cover scraps with bedding. A healthy worm bin should smell earthy, not foul.
Step 6: Let the Worms Grow. Over the first 2–4 months, your worm population and castings will build up. Worms can double in 2–3 months under good conditions, so be patient. Focus on steady care and feeding rather than sales early on.
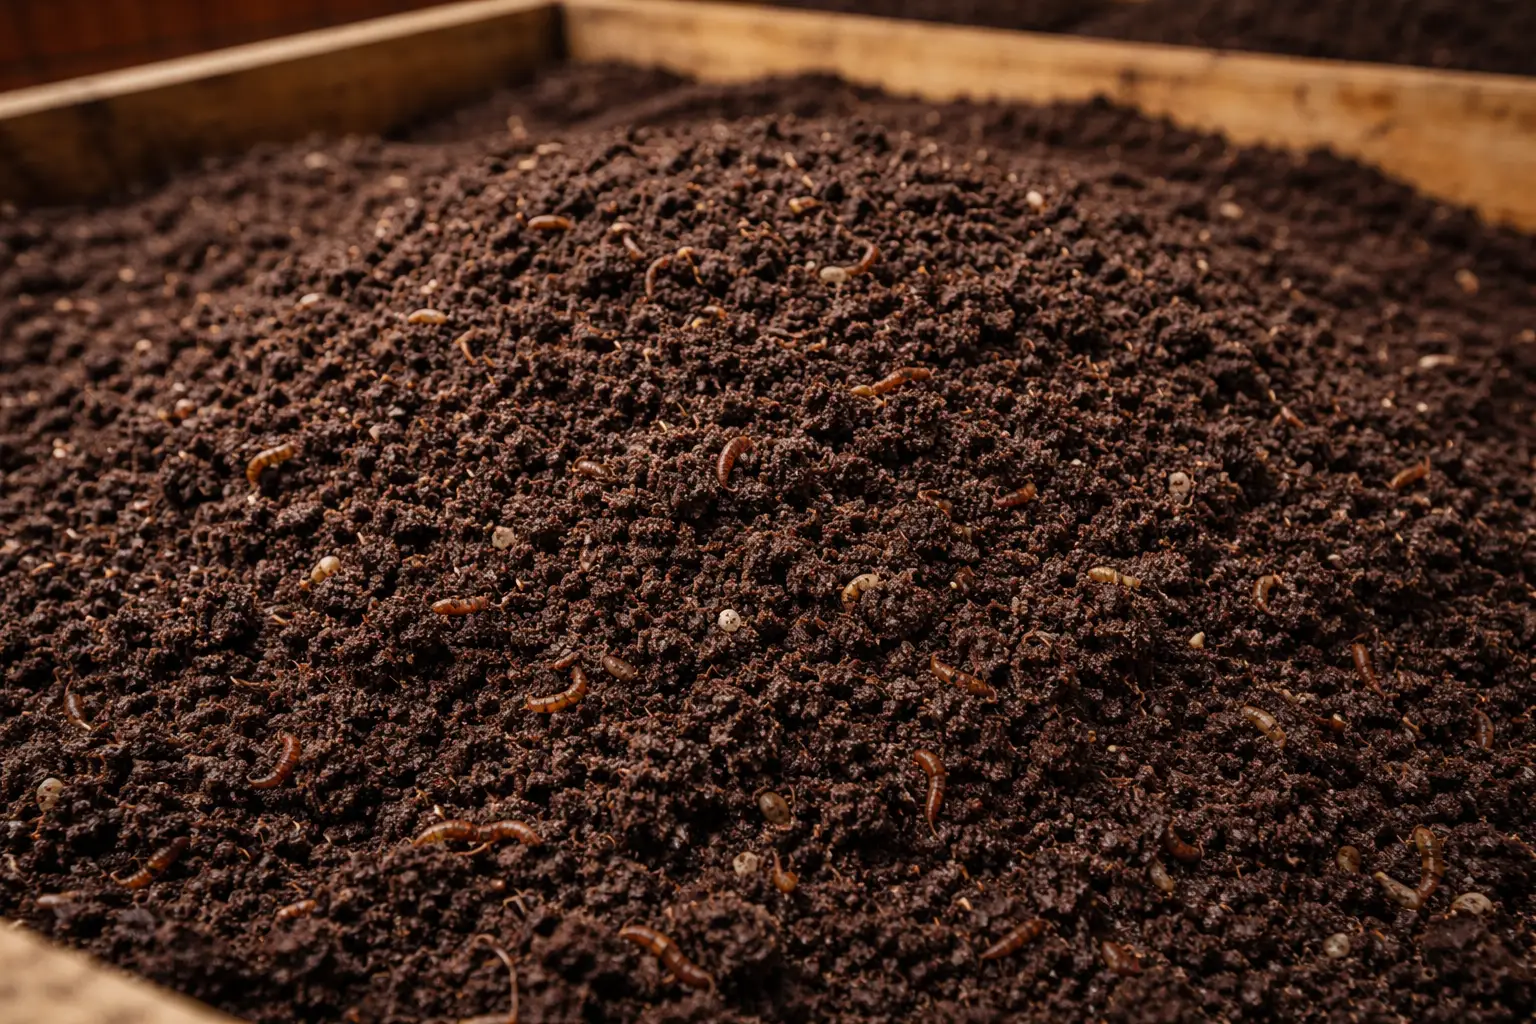
Harvesting Worm Castings
Worm castings (the final compost) are the main product. Here’s how to collect them effectively:
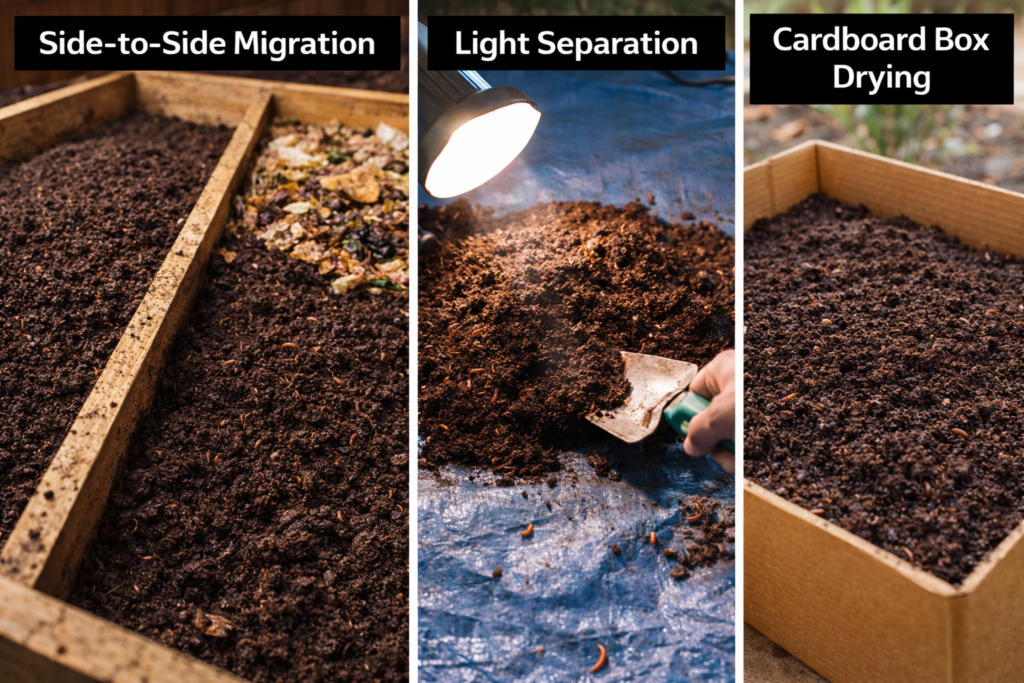
- Harvesting Methods: When most food is gone and castings dominate the top layer, you have a few options:
- Side-to-Side Migration: Push finished compost to one side of the bin, add fresh bedding and food on the other side. Over a few weeks, worms will migrate to the fresh side, leaving castings behind on the original side. You can scoop out the castings without many worms.
- Light Separation: Pour the bin contents onto a tarp or table and shine a bright light on it. Worms will wriggle away from the light, allowing you to scrape off castings as they separate.
- Use Cardboard: As one worm farmer suggests, transfer material to a cardboard box and let it sit uncovered for 2–3 weeks. The extra time lets worms continue processing while the compost dries to a fluffy, hard-free form that’s easy to package.
- Drying and Sieving: Fresh castings are moist and loamy. For retail-quality product, allow them to dry slightly (out of direct sun) until they crumble easily. Use a screen or sieve to remove any debris or stray worms. Store the final castings in breathable bags or containers.
- Preparation for Sale: Screened castings can be sold pure or mixed into potting blends. If making worm tea, soak 1 part castings in 5–10 parts water for 24–48 hours, then strain. (Tea is often sold as a premium liquid fertilizer.) Otherwise, bag castings in retail sizes (1–5 gallons) or bulk as needed.
According to experts, worm castings are exceptionally nutrient-dense, so small amounts go a long way in gardens. This makes them appealing to gardeners who want an all-natural soil booster. As one extension post notes, vermicompost is dark, crumbly, and safe to handle – like “gold” for plants.
Pricing and Packaging
Pricing: Check local market rates and competitor prices. Typical retail prices range widely: $5–20 per pound of castings (depending on purity and brand), and $8–15 per pound for live worms. For example, a 20-pound bag of premium worm castings might sell for $40–$60, whereas a 5-lb bag might go for $15–$25. If you sell live worms (for fishing or composting), expect similar per-pound prices.
When setting prices, account for your costs (materials, packaging, and time) and the local demand. Many small worm farmers give introductory offers (e.g. first bag at a discount) or bundle castings with plants to attract customers. Always label your products with clear weights and usage instructions (organic gardeners appreciate knowing exactly what they’re buying).
Packaging: Use breathable, eco-friendly packaging if possible (e.g. recyclable kraft or woven fabric bags), since castings continue to “breathe” slightly and too much sealing can cause condensation. A common approach is to use plastic-lined cloth or jute bags (the worms industry often uses 5–10 lb breathable worm bags). One worm business owner suggests sourcing cloth bags and shipping supplies from vendors like Uline. For retail, neat labeling with instructions (“Use 1 cup per gallon of soil mix” etc.) adds value.
For larger sales, consider bulk packaging (e.g. 40 lb bags or FIBC bulk bags). A scalable strategy is to start with small retail sizes (1–5 lb bags for gardeners) and offer larger 20–40 lb bulk bags for farms and landscapers. You can charge less per pound for bulk, but still cover costs.
Sales Channels and Marketing
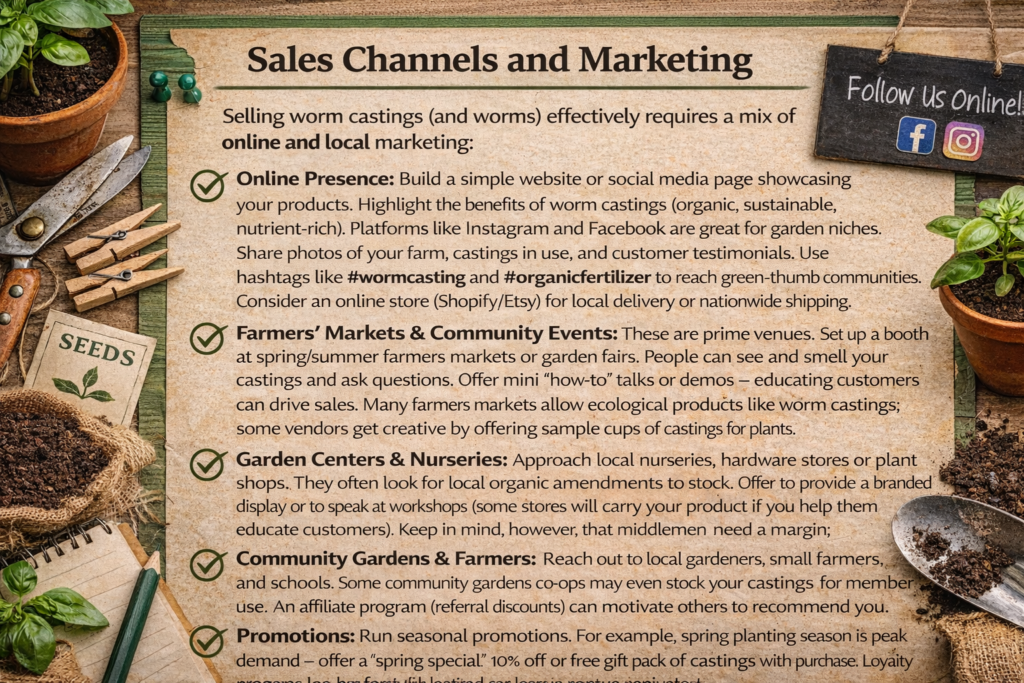
Selling worm castings (and worms) effectively requires a mix of online and local marketing:
- Online Presence: Build a simple website or social media page showcasing your products. Highlight the benefits of worm castings (organic, sustainable, nutrient-rich). Platforms like Instagram and Facebook are great for garden niches. Share photos of your farm, castings in use, and customer testimonials. Use hashtags like #wormcasting and #organicfertilizer to reach green-thumb communities. Consider an online store (Shopify/Etsy) for local delivery or nationwide shipping.
- Farmers’ Markets & Community Events: These are prime venues. Set up a booth at spring/summer farmers markets or garden fairs. People can see and smell your castings and ask questions. Offer mini “how-to” talks or demos – educating customers can drive sales. Many farmers markets allow ecological products like worm castings; some vendors get creative by offering sample cups of castings for plants.
- Garden Centers & Nurseries: Approach local nurseries, hardware stores or plant shops. They often look for local organic amendments to stock. Offer to provide a branded display or to speak at workshops (some stores will carry your product if you help them educate customers). Keep in mind, however, that middlemen need a margin; selling direct (at markets or online) often yields higher profit per pound.
- Community Gardens & Farmers: Reach out to local gardeners, small farmers, and schools. Some community gardens co-ops may even stock your castings for member use. An affiliate program (referral discounts) can motivate others to recommend you.
- Word-of-Mouth & Testimonials: Encourage satisfied buyers to spread the word. Before-and-after photos of plants (with and without your castings) can be powerful marketing content. List any organic certifications or test results if available.
- Promotions: Run seasonal promotions. For example, spring planting season is peak demand – offer a “spring special” 10% off or free gift pack of castings with purchase. Loyalty programs (e.g. buy 5 get 6th bag free) can keep customers coming back.
Remember to comply with regulations. Most locales don’t regulate worms, but some composting standards apply. Label products accurately (e.g. “100% pure worm compost, OMRI-listed for organic gardening” if applicable). Check if you need a business license or sales tax permit for your home farm.
Sample 12-Month Profit/Loss Projection
Below is a hypothetical example of how a small worm farm might fare in its first year, illustrating revenues and expenses. Your results will vary based on local prices, scale, and effort. All figures are illustrative.
- Startup (Month 0): Buy 1,000 red worms (approx. 1 lb) for $45. Purchase used storage bin ($30) and materials ($20 bedding, $20 packaging materials). License/registration ($100). Initial Cost ~ $215.
- Months 1–3: Worms settle in and begin breeding. Minimal sales (maybe a few small 1-lb castings). Expenses: mostly incidental (electricity, tools, time). Net for Q1: approx -$215 (initial costs) since revenue is near zero.
- Month 4–6: Worm population has grown (perhaps to ~2 lbs). Harvest begins. Suppose you produce ~15 lbs of castings in Q2. If selling at $10 per 5-lb bag, that’s 3 bags = $30 revenue. By mid-year, you also do a small market: perhaps earn an extra $20 from selling some worms for bait or starter bins. Total Q2 revenue ~$50. Expenses include modest feed (free), maybe fuel for market ($20) and $20 for new packaging. Q2 Profit/Loss: ~ +$10 (recouping a bit of start cost).
- Month 7–9: Sales pick up in peak season. Worm population ~3 lbs, producing ~30 lbs of castings in Q3. If sold at $10/5lb, that’s 6 bags = $60. Additional revenue from 2 lbs of live worms at $10/lb = $20 (selling to bait shops/fishermen). Total ~$80 revenue. Expenses: add $30 bags, $30 marketing (flyers/ads), $20 utilities. Q3 Net: +$10 ($80–$80 expenses). Cumulative approx break-even at end of Q3.
- Month 10–12: Markets and fall gardens. Yield ~25 lbs castings in Q4 ($50), worms $10. Revenue ~$60. Expenses minimal (mostly labor and tiny supplies). Q4 Net: +$40.
- Year 1 Totals: Revenue ~$190. Costs ~$175 (not counting your labor/time). Profit ~ +$15 by year-end (beyond recovering startup costs). You now have a stable worm colony and can reinvest profits to expand (e.g. another bin or marketing).
By year 2, production and sales would likely increase significantly as your worm population doubles again. Even selling just 10 bags per week at $3 per bag (a modest market stall) would yield over $1,500/year. Many small worm farms eventually clear $5–$20K annually with a couple thousand worms and part-time effort. The key is steady growth: reinvest earnings to buy more bins and worms, and expand your customer base.
Bottom Line: Starting small keeps risk low. You might spend only a few hundred dollars and sell only a few hundred dollars of castings in year one, but careful planning (as above) shows how even a modest market can cover costs. Treat the operation like a real business—track sales, reinvest, and gradually scale up—and worm farming can be both fun and profitable.
Key Takeaways
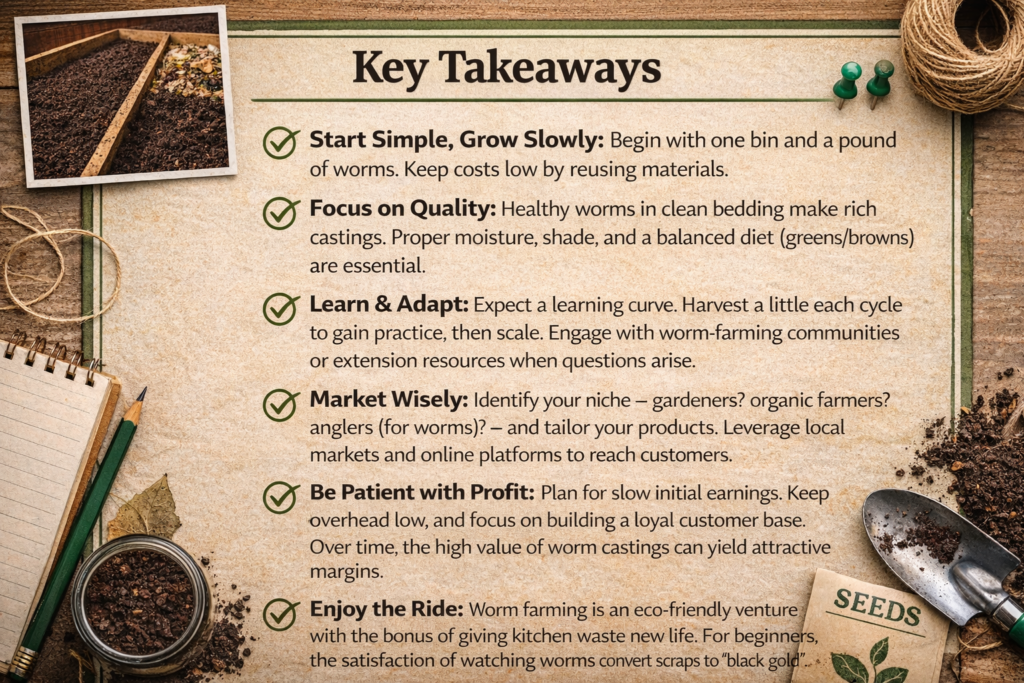
- Start Simple, Grow Slowly: Begin with one bin and a pound of worms. Keep costs low by reusing materials.
- Focus on Quality: Healthy worms in clean bedding make rich castings. Proper moisture, shade, and a balanced diet (greens/browns) are essential.
- Learn & Adapt: Expect a learning curve. Harvest a little each cycle to gain practice, then scale. Engage with worm-farming communities or extension resources when questions arise.
- Market Wisely: Identify your niche – gardeners? organic farmers? anglers (for worms)? – and tailor your products. Leverage local markets and online platforms to reach customers.
- Be Patient with Profit: Plan for slow initial earnings. Keep overhead low, and focus on building a loyal customer base. Over time, the high value of worm castings can yield attractive margins.
- Enjoy the Ride: Worm farming is an eco-friendly venture with the bonus of giving kitchen waste new life. For beginners, the satisfaction of watching worms convert scraps to “black gold” is as rewarding as any profit.
With these steps and strategies, even a first-time worm farmer can turn a backyard project into a thriving side business by 2026. Happy farming (and happy squirming)!